Thursday, May 26, 2011

Provident Living

Here is a short message on becoming provident providers:
To listen or read the whole talk this message came from click HERE!

My husband is taking a class right now in which they have been discussing the different aspects of provident living and becoming better provident providers. I love talking with him about the good things he is learning. It helps us to look at our family and see how we can improve and be better. There are many areas in which someone can practice provident living. Once again our family is looking inward and finding ways to improve ourselves. It is always a constant goal for us to become good provident providers. One area that has blessed our family, is being sure that we have food storage.  Being prepared in this way has helped us when things get tight.
There may be times in our lives when we are not the ones who are in need, but what a blessing it can be to someone else because we were prepared. We can share and bless others when we are prepared. Prepared temporally and spiritually. The Lord is able to use us as instruments to help those in need. There are many people in need..especially with all the natural disasters that have been happening. There have been many helping hands out there giving. On the Church Of Jesus Christ Of Latter-day Saints website www.lds.org there is a page dedicated to provident living. Click link below to go to it:  


 There are so many great links on that page regarding self-reliance and provident living. There are many resources to find out info on what is needed to become self sufficient. There are different links, where you can find ways to help those in need around the world. It is a very informational sight. Here is a sample of what you can find:     
There are many good websites and books that can give us good ideas and information on provident living. 

Years ago when looking for ideas I came across this book that I think is very useful. This book has emergency preparedness ideas, food storage ideas, How to store and how long to store, different ways to enjoy eating your food storage, recipes, etc.


This is a good store to find helpful products: Just click link below to go to website

Basic Living
I have been looking at manual grain mills for a while now! :)

Thought I would share some things that I found. Hopefully something on this post will be helpful to you as it is to me!

Thursday, May 19, 2011

Applesauce Banana Pancakes!

For breakfast this morning we had YUMMY banana pancakes! No oil added! I used applesauce instead. Healthier? Yes!  I had some ripe bananas so I made up these scrumptious pancakes and in turn got smiles and full tummies! Loved it! What a GREAT way to start the day! Now to remember how I made them...

Recipe:
1/2 cup white flour
1/2 cup whole wheat flour
1 Tbsp baking powder
2 Tbsp sugar
1/4 tsp salt
1 cup milk
2 heaping Tbsp unsweetened applesauce
2 ripe bananas slightly smashed
1 slightly beaten egg
 Makes about 12 pancakes

Combined dry ingredients. Add wet ingredients. Stir to make batter. Careful not to over mix. Batter will be lumpy and a bit thick. Heat griddle on Med or about 275-300 degrees. Cook until golden brown on both sides or until cooked through. Serve warm and top with your favorite toppings! I like unsweetened strawberries (any fruit really) and unsweetened applesauce! Just plain GOOD!
 YUMMY!!

Friday, May 13, 2011

Blue Jeans to Bag Tutorial!

   I needed a new bag..So I started looking at the fabric I have. As I looked at my fabric I didn't really have any material that was real durable.  So I went looking in my closet..Now if you are anything like me, you have clothes that are different sizes. Pregnancy has had that weight gain/loss effect on me. :)  Needless to say, I have skinny jeans and in-between jeans, also maternity jeans.  I found a pair of in-between jeans that would make a good bag. So the project started! Follow this tutorial to make a NEW bag!

Materials: Sewing machine, Fabric (1- 1.5 yards will do of same or scrap material), Thread, magnetic button, 
1. Cut the leg bottoms of the jeans..I cut about 13" from bottom. (or cut the size fabric you want your bag..remember the seam allowance) Cut up the inside seam of each leg. You can  trim off any excess inseam. This will be the main part of bag.
 2. Using one of the open sides as a pattern, cut 2 contrasting pieces for the bags inside liner. Cut your inside layer at least 2" taller if you want to fold it over for a trim.  I only cut mine 1.5" taller and it wasn't enough..you'll see later.
 3.Cut 2 contrasting material (or same as main bag) for pockets.  Measure how big you want the pockets.  I measure up one side of the bag, starting from bottom of main bag. The pocket size I used was 7" x the width of the bag. (note if you use a pant that has a small flare like mine were the bag will not be totally square.) I cut my pockets straight and trimmed off the excess fabric later..you can cut it the same shape now or later. Use the side of your main bag as a pattern for the width of pockets. I doubled up my pockets for strength. So I cut two pieces for each side. Four in total. I used contrasting fabric for inside liner. Just like for the inside liner for the main bag, cut the pocket liners about 2" taller than the outside pocket. If you want the trim of course. Then lay them wrong sides together.  Fold and iron top of liner 1/2" down. Then fold over pocket and iron. Sew on the top of trim 1/8" from edge.
 4. After putting together both pockets (one for each side of bag), lay one pocket on outside of the main bag. Sew down the center to connect it to the bag and create two pockets on one side. Do the same to the other side. remember to back stitch. I also went over it twice. Now you have four pockets! two on each side of bag. Sorry, I don't have a picture of the pocket sewn on.
 5. With pockets sewn, put right sides of bag together and pin.  Make sure you have a heavy duty needle or one that can be used on jeans. Sew around sides and bottom. 1/2" from edge..don't accidentally sew the top closed. Pull right side out and push the corners.
 6. Now to sew the liner of the bag..quick and easy.  Pin right sides together and sew 1/2" around sides and bottom. After sewn put the liner in the bag. Wrong sides together.
 7. Remember I said that I cut my trim too short..Well, I just left the edges raw with the frayed looked.  Otherwise you would do what you did for the trim on the pockets. Fold and Iron. To add the magnetic button you will want to mark where you want it on the inside of bag. Cut with a seam ripper. Then push it through both layers of the bag..minus the trim for the outside. Put the washer on the back and bend the prongs tight on washer. Do same on the other side of bag with the other side of button. Make sure to match the position of button sides.
 8. Fold over trim and sew 1/8" from edge.  I sewed a second row 1/8" from first.
9. I wanted something easy for the strap. I cut the waistband off the jeans and used that. Cut the belt loops off..be careful not to cut too close to the waistband, this could make holes. Cut the waistband in half and now you have two straps.  The button connects the strap at the top. Fold the raw edge of strap under about 1.5" and pin on one side of bag, preferably on the side seam. Sew a box with an X..I went around twice. Do the same on the opposite side. 
The bag is done!  Turned out a bit more juvenile then I would prefer..but It's a bag. When going places or running errands with my kids, I always need some sort of bag for those snacks or diapers etc.  Just remember, if it doesn't turn out the way you imagined, at least you learned something. Or you can give it away as a gift!!

Tuesday, May 10, 2011

Giveaway! Enter to Win!

(My Shop!)
 is sponsoring a giveaway on 
 Check out her blog and enter to win stuff from MY SHOP!! 
YIPPEE! 
"Like" It and Share It! 

Monday, May 2, 2011

Mother's Day Flower Card Tutorial

 Give your Mom a little card full of gratitude for all she has done for you..Put a flower clip or pin on it for her.
Put two or three pins on the card! She can pin these flowers anywhere..purse, shirt, sweater, shoes, hair etc.   These fabric flowers are similar to the little flowers I put on the shirt front here.

Materials needed:  Card material (I used cardstock and stamps. I don't have much card making supplies.) hole punch, fabric glue, scrap material, pearl or bead, thread, bobby pin or brooch pin, felt, scissors, sewing machine

1. Choose some fabric. 
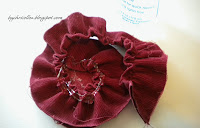
Cut a strip of fabric..Size will depend on how big you want the flower.  I cut a about a 3" strip that was a foot in half long. This made a 2.5" flower when finished. Fold in half long ways. Sew a basting stitch (longest stitch) either down the edge that is frayed for a clean look, or sew down the folded edge for the frayed look. Pull thread gently and gather the strip.
 2. Cut felt into 2 circles, matching color to fabric. Glue gather fabric in a spiral on 1 felt circle.
 3. Adorn the center with a bead or a pearl etc. Sew it on.
 4. Choose a pin.  I used a booby pin. Slide the second felt circle in the booby pin. (If using brooch pin glue the second felt circle on the back matching the 1st circle. Use some heavy duty glue to attach brooch pin or some can be sewn on.) Put glue on the felt circle that has the bumpy side of the pin, not the straight side. Attach to the back of the flower matching the felt circles. Wait for it to dry.  Dries fast.
 5. Use card stock or other card material and punch a hole in center.  Decorate the card..be creative.  Pin the flower on the front.  My card is real simple!  Add two or three..experiment..make mini flowers..there are many possibilities! Let those creative juices flow!
 6. Give your card and gift away!
Related Posts Plugin for WordPress, Blogger...